The Science of Freshness: Why Coffee Grind Size Matters
When it comes to brewing exceptional coffee, freshness and grind size are two of the most important and often overlooked

If you love coffee as much as we do, you’re more than likely to have come across some masterful latte art in your day-to-day coffee run. And if not, you’re still likely to have seen trendy coffee artwork on your local café or friends’ social media.
As it says in the title, latte art is a type of artistry and it often feels a shame to ruin such picture-perfect latte art designs by taking the first sip. So, it’s no wonder why this Instagram-able coffee trend has got so many of us snapping photos of our latte art for socials – it’s downright impressive!
Our beginners guide to latte art is a must-read for anyone who wants to give latte art a go. Read on for some tips and tricks on how to master the perfect latte and coffee artwork including the best espresso beans, best milk for frothing and a collection of our favourite easy latte art designs.
Choosing the best espresso beans is the most important step in creating flawless latte art. Pennington’s coffee bean roasters use their very own unique roasting recipes to give you the highest quality and consistency of coffee beans and ground coffee blends, perfect for all coffee artworks.
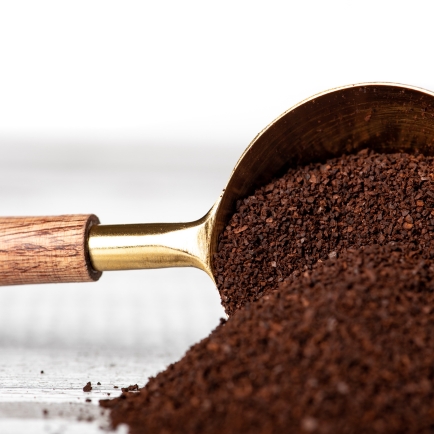
If you are using an espresso machine and coffee grinder, you must first determine your ground coffee dose based on the basket size of your portafilter, where the ground coffee will sit. Make sure the basket is clean and dry before grinding the whole coffee beans. Coffee grinders generally come with recommended settings to accommodate the different dose sizes. After grinding the beans, settle the ground coffee by tapping the portafilter on a hard surface and compress the grounds with a tamper.
Next, lock the portafilter into the group head and get ready to pull the shot. The ideal time for your shot to pull is between 25 and 30 seconds. Your espresso shot should be a deep brown colour and have a top of lighter brown foam called crema. Now you have an excellent base for your coffee artwork.
Now for the tricky bit! When it comes to how to make the perfect latte, second to pulling the ideal espresso shot is the milk steaming. You want to achieve an aerated, silky and shiny texture to your milk so your latte art designs stand out against the brown coffee shot for the most jaw-dropping presentation. Among the list of barista skills, mastering the perfect milk is often regarded as one of the more challenging steps to creating the perfect latte.
The first step to creating the best milk for latte art is to aerate the milk using an espresso machine. Start by pouring cold milk into a milk frothing jug. The ideal barista’s milk jug is made of thin stainless steel so you can feel the temperature of the milk. Position the tip of the steam wand into the milk slightly off centre and hold the jug at a 10-15° angle. Then open the valve fully. The aerating process should not exceed 35°C as protein in the milk will be disrupted above this temperature. The micro-foam created in the aerating stage is used to create beautifully contrasted latte art.
To emulsify the milk, lift the milk frothing jug closer to submerge the wand, making sure it doesn’t touch the bottom of the jug. Heat until the milk reaches 65°C (or when the milk jug is too hot to touch) then close the valve. Finally, bang the base of the jug against a hard surface to mix the micro-foam for the perfect texture. The milk should now have a perfect silky consistency and glossy appearance and is ready to be used to create your desired latte art designs.
In our opinion, the best milk for frothing is whole milk because of its’ high fat content but the best dairy-free alternative for a smooth micro-foam consistency is oat barista milk.
The Heart design is usually the first design a barista will learn to pour as it is considered the simplest coffee artwork to master. This latte art is an excellent place to start for a beginner but be prepared to practice as perfecting this craft can take weeks and requires a steady hand.
Next up is the Tulip design. The three-stack Tulip is one of the most popular designs in cafés around the world for its professional, eye-catching and aesthetic appearance. A trained barista can pour this design relatively quickly so it’s ideal for busy days yet is still super impressive.
The most common form of latte art in the UK is the Rosetta design. The Rosetta, also known as the fern, is named as such because of its resemblance to the type of flower it mimics. When learning to pour this distinctive pattern, remember to focus on the speed at which you are pouring the milk, the distance you are from the coffee shot and the area of the cup you are pouring into.
Once you’ve mastered the above latte art designs, it’s time to move onto something a little more challenging. The Swan design incorporates the Rosetta pattern as the body of the Swan and the heart as the head. Put everything you’ve learnt from the previous patterns to use and give this more advanced coffee artwork a go!
Mastering the art of coffee artwork won’t happen overnight but it is well worth giving it a go. Latte art takes patience, practice and lots of coffee making. If you think your barista skills are lacking, visit your local coffee house for the perfect latte, cappuccino or whatever else takes your fancy.
Check out Penningtons delicious range of ground coffee blends and coffee beans today.
When it comes to brewing exceptional coffee, freshness and grind size are two of the most important and often overlooked

When spring arrives, so does one of the most beloved seasonal traditions: Easter eggs. From beautifully wrapped chocolate treats to